Vegetable Paella

I’ve had my eye on Caroline’s Vegetable Paella recipe from TasteLoveandNourish.com for a long time, and I finally decided to give it a go.  She has wonderful plant-based recipes with tons of flavor.  Here is a link to her completely vegan original recipe. Caroline adds artichoke hearts to her, but I think it was fine without them.

Fortunately, I had almost all the ingredients in my pantry, and was able to make a few substitutions that worked well.  I don’t know about you, but during this time of social distancing and staying home, I’m learning to be much more creative!  I roughly halved her recipe since I’m only cooking for three right now.

Ingredients

1/2 tsp saffron threads
2 Tbsp hot water
2 1/2 Tbsp olive oil or bacon drippings (to add smokiness)
1 large onion, diced
4 ounces mushrooms, sliced (I used half regular button and half baby bellas)
2 big cloves garlic, finely chopped
2 very small zucchini, halved and sliced

1 tsp paprika
1/2 tsp hot smoked paprika
1/8 tsp ground cayenne pepper
1/4 tsp dried thyme leaves
2 bay leaves
1/2 tsp sea salt
1/4 tsp ground black pepper

1 1/4 cups short-grain rice (I used Arborio)
1 cup dry white wine
1 1/2 cups vegetable broth (or chicken broth)
14.5 ounce can diced fire-roasted tomatoes (or regular diced tomatoes), drained
1/2 cup frozen green peas
2 Tbsp capers, drained
1/4 cup big green Italian olives with pimentos,halved

handful fresh parsley
drizzle extra virgin olive oil

In a small bowl, pour hot water over the saffron. Set aside for at least fifteen minutes.

Preheat the oven to 450 degrees. Move a rack to the bottom third of your oven.

Keep the onion, mushrooms, zucchini, garlic, spices (see below), rice, white wine, broth and saffron/water in bowls near the stove – you’ll be adding them separately and cooking them fairly quickly.

Heat the olive oil in a large oven safe skillet over medium high heat.
Add the onion and cook for just two minutes.
Add mushrooms and cook without stirring for about two minutes. Stir and cook for two more minutes or until just beginning to brown.
Add the garlic and cook for one minute.
Add the zucchini slices and continue cooking for three minutes.

In a small bowl, mix the spices: paprika, smoked hot paprika, cayenne, thyme and bay leaves, salt and pepper. Add to skillet, stir and cook for a minute or two.

Add the rice and stir to coat.
Add the white wine. Simmer until reduced by about half.
Add the vegetable broth and the saffron with the water. Stir gently and bring the pan to a simmer. Cook for a couple of minutes.
Scatter tomatoes over the top.
Transfer the pan to the bottom third of the oven, and bake for 15 minutes.
Scatter the peas, capers and the olives over the top.
Continue baking the paella for 10 minutes or until the rice is tender.
Remove the bay leaves.
Garnish with fresh parsley and a drizzle of extra virgin olive oil.

Warm Cabbage with Apples and Bacon

cabbage-isara-somboon

image by Isara Somboon at Unsplash.

Love this recipe that came from a local grocery store around St. Patrick’s Day!

So much so that I’ve made this beautiful, colorful dish twice in the last three weeks.  It’s delicious but also such great comfort food – which is something we all need right now.  I serve it with a cheddary sausage and they’re really good together.

The lovely thing is that cabbage is so hardy – you can use half the cabbage now, and then make this again in a few weeks.

Ingredients:

6 slices bacon, chopped into 1/2″ pieces (if using turkey bacon, add 2 Tbsp Olive Oil)
1 tsp freshly ground black pepper
8 cups chopped green cabbage (1″ pieces are fine) about 1/2 medium cabbage
1 apple, cored and chopped into 1/2″ pieces
1/2 red onion, chopped
1/2 cup dark beer (or the equivalent in cider, plus a Tbsp of cider vinegar)
1/4 cup apple cider (or apple juice)
2 tsp brown sugar or honey
1 tsp caraway seeds
1 tsp Kosher salt
1 Tbsp butter (optional)

In a large cast-iron skillet, cook bacon sprinkled with black pepper until crispy. Remove from pan, but leave drippings. Add onions and cook for a couple of minutes, then add cabbage and apples. Cover and cook 10 minutes, stirring occasionally.

In a small bowl, mix beer, cider, brown sugar, caraway seeds and salt. Add to cabbage mixture and cook 5 minutes more until everything is soft the liquid has reduced a bit. Drop bits of the butter on and give a final stir.

Serve as is on a baked potato, or with a lovely cheddar-ry sausage! (If you start pan-frying the sausage at the same time, the sausage should be done when the cabbage is.)

For a vegan version, leave out the bacon, and add a bit of chipotle pepper for that smoky flavor and a bit more salt to make up for the saltiness of bacon.

Brodo with Chicken and Spinach

brodo-3Another great recipe from Johanne Killeen in the Slow Food Fast recipes in the WSJ – with some changes.  Brodo is a simple soup that comes together fast and is incredibly satisfying.  It’s also quite flexible and can use different pastas and different greens

It’s been ridiculously cold and windy here!  We needed something to warm us up – and this sure fit the bill.  This makes enough for two people, roughly.

Ingredients:

kosher salt and freshly ground black pepper
4 cups rich chicken stock
2 eggs
1 cup chopped cooked chicken, optional
2 cups chopped fresh spinach or thinly sliced kale
1/3 lb capellini, spaghetti or linguine
fresh grated Romano or Parmesan cheese

Bring a pot of salted water to boil and add the pasta. Cook until al dente and drain water. Keep warm.

At the same time, add the chicken stock to another pot and bring to the boil, then reduce heat and gently drop eggs in to poach. After 3 minutes or so, scoop eggs out onto a plate.

Add spinach to chicken stock and cook for a few moments. (You may need to cook a little longer with Kale.) Add chicken meat if using and stir. Add a pinch of salt and 1/4 tsp freshly ground black pepper.

Place some pasta on one side of each bowl. (It’s going to slip around a bit, but that’s okay.) Ladle the chicken and spinach with broth on the open side of the bowl, and top with the poached egg.

Grate cheese over, sprinkle once more with black pepper and serve. The egg yolks will help thicken the broth and add incredible richness.

So fast and so delish!

Ina’s Iceberg Salad with Creamy Blue Cheese Dressing

blue-cheese

Beautiful Blue Cheese by PDPhotos on Pixabay.

I made this for Christmas Morning brunch and it was delicious. Maybe my favorite blue cheese dressing ever.

For the dressing:

4 ounces blue cheese, crumbled
2/3 cup good mayonnaise
1/3 cup plain Greek yogurt
1 tablespoon sherry vinegar (I used red wine vinegar)
Kosher salt and freshly ground black pepper

For the salad:

4 tender inside celery stalks, trimmed and sliced crosswise 1/4 inch thick
6 radishes, trimmed and sliced into thin rounds
5 scallions, trimmed, white and green parts sliced

1 large head iceberg lettuce, wilted outer leaves removed and sliced into 1″ layers
4 to 6 ounces blue cheese, crumbled
Fleur de sel

Buzz the dressing ingredients with a buzzwand (sorry, immersion blender) in a medium pitcher until creamy and smooth.

Mix the celery, radishes and scallions in a small bowl.

For each serving, lay a slice of iceberg lettuce on a salad plate. Top with the celery mixture and pour dressing over. Sprinkle with blue cheese crumbles and a bit of fleur de sel.

Serve immediately. The radishes and scallions add a lovely spicy bite to the creamy, fresh salad.  You might want to halve the slices if your family are not big salad eaters.

Mushroom and Roasted Tomato Cheesy Pasta Cast Iron Skillet Bake

Mushroom-and-roasted-pepperI love Christmas Eve, since we always celebrate with  my brothers and sister at my brother Ron’s house, and we all bring a dish to share for dinner.  In the middle of prepping my dish, I started to get hungry and decided to make something for lunch.  But what?

Since I hadn’t really planned anything, I just checked the fridge and came up with a recipe on the fly.  Had some mushrooms and grape tomatoes on their last legs, half a red onion I wanted to use up, some lovely pasta and two nice chunks of cheese, only one of which I was sure was Asiago.

The dish came out so delicious I actually sat down and wrote it down right away.  Here is the recipe, in stages.

Preheat oven to 425 degrees, and start by roasting the tomatoes, since that takes the longest.

1 package grape tomatoes
little olive oil
salt and pepper – just a good pinch of each

Put grape tomatoes in a small baking pan and roll them in the oil, salt and pepper. Place in the oven and roast for quite a long time, (maybe 30 minutes?) until the tomatoes have collapsed a bit and there is a nice caramelized smell. No need to stir them or mess with them at all.

Veggies:

1 Tbsp olive oil
1/2 red onion, chopped
1 green bell pepper, chopped
1/2 tsp salt
1/4 tsp pepper
1/2 tsp garlic powder
1 pinch red pepper flakes
2 packages sliced baby portabella mushrooms

Heat oil in a cast iron skillet. Add onions, peppers and seasonings and saute for a few minutes, until onion is softened. Add mushrooms and cook, stirring frequently, until the mushrooms have released their water. But don’t stop – keep cooking, stirring once in a while until the the water has dried up again.  Turn off the heat.

Pasta:

At the same time, bring a pot of salted water to boil and add 3/4 pound of any kind of pasta and cook to al dente. Drain the water and add the pasta to the veggies.

Check the tomatoes and if they’re softened, scrape them and any juices into the veggies.

Turn the oven to 350 degrees.

Create sauce:

Put the pasta pot back on the burner.

1/4 cup butter
2 Tbsp flour
/2 tsp salt
1/4 tsp pepper
good pinch red pepper flakes
good pinch garlic powder

2 1/2 cups chicken stock
1 cup shredded Asiago cheese
1/4 cup some other shredded cheese – maybe it was a White Cheddar?

Melt butter in pasta pot and add flour, stirring well for a few minutes. Stir in the seasonings, then add in the chicken stock. Cook for a few minutes until the sauce is thickened a good bit, then add the shredded cheese, holding back 1/4 cup for later.

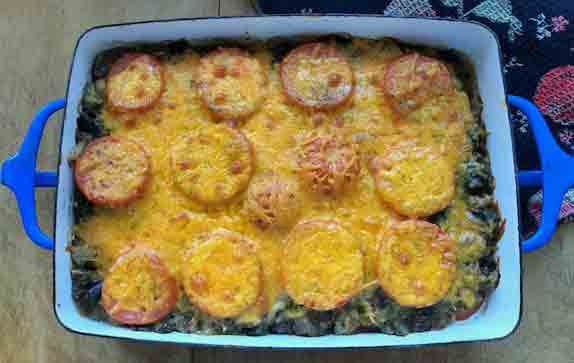
Stir until everything is nice and creamy and check the seasonings. Pour into skillet with veggies and pasta and stir gently. Top with reserved cheese and pop back into the oven for 20-25 minutes until the top is browned just a bit here and there.

Let sit for a couple minutes and serve. Soooo good!

Caitlin’s Charcuterie Tray/Board

Caitlin's-Charcuterie-TrayWe were going to a friend’s holiday get-together and I wanted to bring something a little different to share. Caitie suggested a charcuterie board and we picked up crackers, meats and cheeses to make it.

We always have a variety of nuts and dried fruits in the house and I had some amazing spiced cherry preserves, so we got started. (Basically I hunted up whatever Caitlin could think of and she arranged everything!)

Here’s what I learned:

1. It’s always nice to have at least two versions of everything.

    • Cheese – we had a nice Brie and cubes of a good cheddar.
    • Meat – we used Prosciutto, Capocollo and Calabrese Salami from a pre-packed tray. You  could also use any spicier turkey salami or turkey ham. Just make sure they are thinly sliced and bite-sized.
    • Nuts – we had cashews and almonds
    • Dried fruit – we used Craisins and candied ginger
    • Something sweet – we had Costco’s chocolate covered raisins

2. A board is nice but it’s more practical to use a tray with an edge to keep things from rolling around. (We actually used a Costco pie tray.)

3. Meats work best rolled into a tube, or a cone. They’re easier to stack and to pick up.

4. Hard cheeses should be cut into little squares. Soft cheese can be served in a chunk.

5. When you place items on the tray, try to keep the items in wedges going around. We started with a nice Brie and a pot of spiced cherries in the middle, and built around that.

6. Plan to vary the ingredients by color. It looks much prettier if you have a light colored item and then a dark item, etc.

7. Use a tiny bowl or cup for any type of relish.  I used a Oui yogurt glass container – can’t bring myself to throw them away – and it worked perfectly.

8. A little greenery (we had fresh rosemary and parsley blossoms) adds a nice fresh contrast to the dish.

9. Crackers or little slices of baguette are the perfect thing to serve on.

10. A small knife, fork and spoon are all you really need for serving. You could probably include toothpicks if you want, but we didn’t really need it with the little fork.

11.  You can cover it with plastic wrap or with the top of the pie tray if you have it.  ( I just peeled the label off carefully and it worked great.)

It’s a lovely thing to bring if you’re visiting and there’s always something for everyone.  Thanks for sharing your charcuterie knowledge with me, Caitlin!


Rich Custard for Maya (with Variations)

This recipe, which seems too simple to be so delicious, has always been an integral part of my Strawberry Trifle recipe. But my daughter Maya asked me to list it separately, so it’s easier and quicker to find. So here you go, Maya!  

1 cup sugar
1/2 tsp salt
1/4 cup cornstarch
5 cups whole milk
4 eggs, well beaten in a medium sized bowl
1 1/2 Tbsp vanilla

Blend sugar, salt, cornstarch and whole milk in a large saucepan on medium heat. Bring to a gentle boil stirring constantly. Once the custard reaches the boil, remove from heat and add 1 cup to the eggs in the bowl, stirring vigorously so the eggs don’t cook. Add another cup of milk mix to the eggs, and continue stirring.

Return the whole thing to the saucepan and put back on medium/low heat. Heat for 1-2 minutes until the custard is just starting to bubble a little. Don’t leave it for a second at this point or it will curdle. Remove from heat and add in vanilla. Let cool before adding to trifle dish.  It will thicken as it cools

This recipe also makes a lovely pouring custard. Just add another cup of milk. We don’t eat pouring custard much in the US, but it’s delicious dessert sauce. Just a bowl of fresh fruit with pouring custard poured over – simple and wonderful.

This Vanilla custard is delicious as part of a Strawberry Trifle.  

Variation #1  Mango Trifle with Cardamom Custard 

Variation #2 for Chocolate Custard:  skip the Vanilla, add a generous 1/3 cup cocoa to the sugar and cornstarch, and pour in a little of the milk. Stir well until the cocoa is completely mixed in.  We didn’t increase the sugar and it tasted fine.   See my Chocolate Raspberry Trifle.


Grilled Flank Steak with Charred Eggplant and Mint

deviyahya-WiTkMXDCal4-unspl

Eggplant by Deviyahya on Unsplash

This is another great recipe from the Slow Food Fast column in the Wall Street Journal,  from chefs Melissa Hamilton and Christopher Hersheimer.

We made this with the last of the eggplant from the garden tonight and it was easy and good. It’s also a great way to use mint before the first freeze.  Makes enough for 4 hungry people.

Ingredients:

2 lbs. flank steak
6 tbsp Olive Oil
kosher salt and freshly ground black pepper
8 small globe or Japanese eggplants, halved. (If you use regular size eggplants, cut them into 1″ slices, lengthwise.)
Juice of 2 lemons (about 1/4 cup)
2 cloves garlic, smashed or 1/2- 1 tsp garlic powder (use more if you love garlic!)
a good pinch of red pepper flakes
1 cup fresh mint leaves, chopped

Pat steak dry and use a sharp knife to lightly cut a crosshatch pattern on both sides. Drizzle with Tbsp olive oil on both sides and season with salt and pepper on both sides.

In a big bowl, mix lemon juice, olive oil and a pinch of salt. Add the eggplants and stir until everything is well coated. Remove the eggplants to a plate and to the remaining sauce in the bowl, add garlic, red pepper flakes and mint leaves. Stir gently to blend.

Grill steak on high heat until browned on both sides, about 3 minutes per side, then remove from heat, cover and let rest 10 minutes before slicing.

While steak is resting, lay eggplants cut side down and grill 4-5 minutes. Then flip and grill 4-5 more minutes. Remove from heat and add back into the bowl with mint sauce. Toss gently to coat.

Slice steaks thinly across the grain, and serve with eggplants and mint sauce. So delish and so fast!

Note: this recipe would also be wonderful with lamb, or for a vegan version, with cauliflower steaks!

Eggplant, Tomato and Onion Pie

eggplant-and-tomato-pie

Made this for supper last night and it was so good! Based very loosely on a recipe I found online – it is super satisfying and requires no meat.  I used a really good Tillamook Cheddar cheese, but any good sharp cheddar would do.  It uses slices of tomatoes in place of crust, and is wonderful warmed up the next day.

Ingredients:

1 medium eggplant, unpeeled and diced into 3/4″ pieces
4 big Roma tomatoes, sliced (other tomatoes would be fine, too)
1 onion, rough chopped
4 cloves garlic,crushed
1 Tbsp olive oil
1 Tbsp butter
1/2 cup panko breadcrumbs
1 egg
1 tsp kosher salt
1/2 tsp freshly ground black pepper
2 tsp dried basil
1 1/4 cup shredded sharp cheddar cheese

Directions:

In a saucepan, bring 1/2 cup water to the boil and add eggplant. On medium-high heat, cook eggplant, stirring frequently,until eggplant is very soft and water is mostly evaporated. (Took about 8 minutes for me.)

Heat olive oil and butter in a frying pan. Add onions and cook until soft, 5-6 minutes. Make a well in the middle of the pan, add a little more olive oil and add garlic. Saute for a couple of minutes, stirring constantly.

Add onions and garlic to eggplant mixture and allow to cool slightly. Add salt, pepper, basil, breadcrumbs and egg to eggplant mixture and stir well.

Lightly oil the bottom of a pie pan, and layer 1/2 of the sliced tomatoes on the bottom. Season tomatoes with a little pinch of salt and pepper.  Pour the eggplant mixture over the tomatoes and smooth the top. Layer the rest of the tomatoes on top, season lightly again with salt and pepper and sprinkle cheddar cheese over.

Bake at 350 degrees for 30 minutes. Then turn on the broiler and heat another 4 minutes so cheese is well melted and just starting to brown in spots.

Remove from oven, allow to rest a few minutes and serve. So delish!

Silver Lining Sour Cream Rhubarb Coffee Cake

market-fresh-rhubarb-3503166_1920

Image by MikeGoad on Pixabay (be sure to cut off and discard all leaves!)

Rhubarb can be a bit too tangy for many people, but it is amazing in coffee cake. My version is stuffed with fruit and features a slightly crunchy, cinnamony crumble top.

We had a huge hailstorm a couple of nights ago and among other things, my rhubarb was demolished. There was nothing to do but gather up the broken stems and dice them up for baking. I froze most of the diced rhubarb, but used 4 cups for this recipe.

Fingers crossed, my plant will recover, but in the meantime, we’re enjoying this moist, delicious cake as the silver lining from an awful storm.  And yes – you can use frozen rhubarb in this recipe – just let it thaw for a bit, and drain off any juices that accumulate.

Cake ingredients:

1 cup white sugar
1 tsp baking powder
½ tsp kosher salt
2 cups flour
2 eggs, beaten
1 cup sour cream
1 tsp vanilla
4 cups rhubarb, diced

Topping:

1 cup sugar
¼ cup melted butter
1/3 cup flour
1/2 tsp ground cinnamon

Mix 1st cup sugar, baking powder, salt and flour In a large bowl. Add in 1 cup sour cream, vanilla and eggs and stir until smooth. (Batter will be very thick.) Add rhubarb and stir to distribute evenly. Scoop into a 9 x 12” baking dish and smooth top with a spatula.

In a small bowl, mix 2nd cup sugar, melted butter, flour and cinnamon until very crumbly. Sprinkle evenly over cake.

Bake for 45-50 minutes until a toothpick inserted in the middle comes out clean.  So good – I’ll be surprised if you can stop at just one piece!